As promised, I hauled out the tools for hand embossing, glad yet again of the Winnowing that made this a couple of minutes' search rather than a frenzied marathon of pawing through crates.
You need a light source, stencils, as Becki astutely remembered, and an embossing tool.
On the left here, that blue thing is a corner punch, a nice touch for handmade cards and books, gives a rounded corner, very posh.

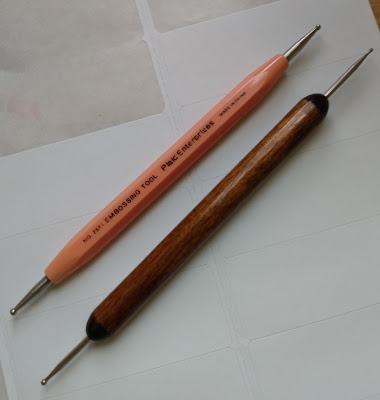
The process can be as simple as taping to a window, creating your own stencils or just using commercial ones, and if you don't have a burnisher, a blunt knitting needle or even pencil will work. Kids like to use a pencil so they can see where they've been.
You can make this as original and elaborate as you want -- I've done embossing into large watercolors as part of the composition, using purpose cut cardboard stencils -- or you can do what I did here, and had a nice time doing, a couple of greeting cards.
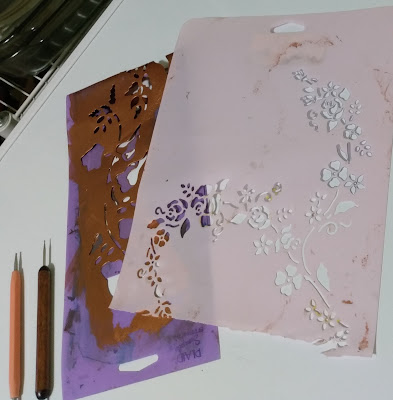
The procedure: tape your stencil to a light source, window, lightbox, whatever you're up for.
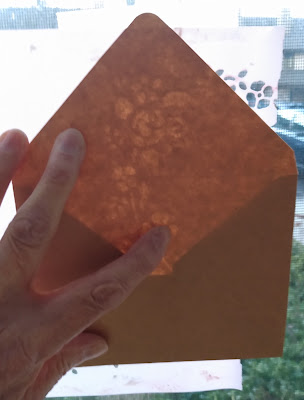
Then hold or tape your card/painting/paper/ envelope, whatever you're embossing, over the stencil.
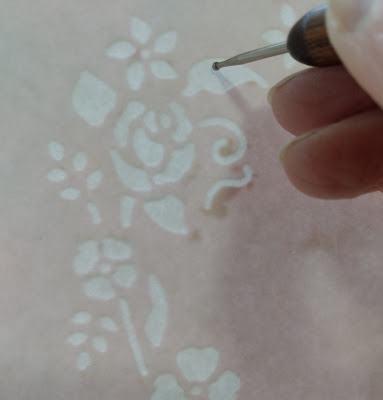
Now firmly run your embossing tool all around the inside of the openings. You need to apply enough pressure to make the image sink into the opening in the stencil. You only need to work on the edges. The center will follow without your touching it.
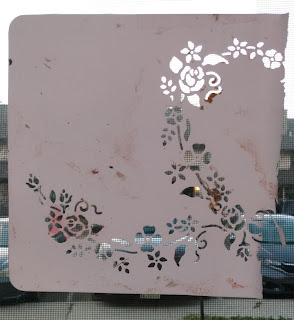
You need to remember that you're working from the back, and right to left for lettering, if you're embossing to get a raised image. If you really want an engraved, sunken, image, work from the front, lettering the usual left to right.
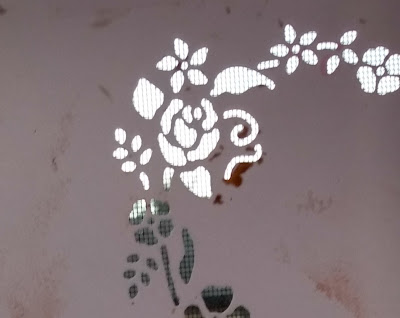
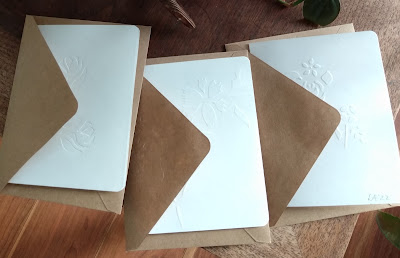
Here are both
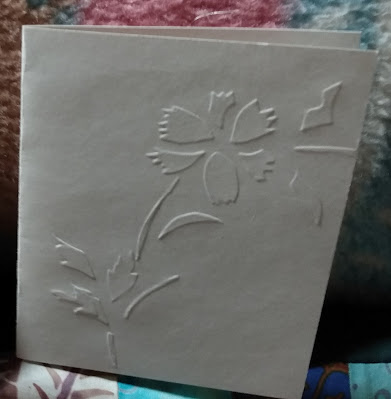

The back of each is the other. You can have an embossed front to a card, open it and on the left is the engraved image. And you can make use of this to make mixed images using both embossed and engraved in one composition.
So that's pretty much it.
It was good that this subject came up, because I had a sudden surprise visit yesterday afternoon from a friend I hadn't seen for years.
She threw my 80th birthday party, lovely person, the sister of the friend I helped care for with her in her final days at home. She, sister, Gary, all friends.
Anyway she came bearing home-dipped chocolates
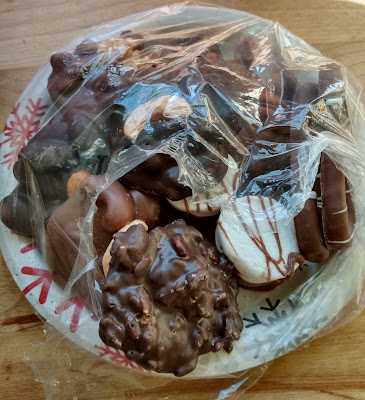
Intended for Christmas, and finally got here.
So that requires a little thank you card, why not an embossed one. Timely. Plain unlined 8x5 cards are good for this.
While I was looking for the burnishers, I came across these pens. I'm digressing here, as I tend to
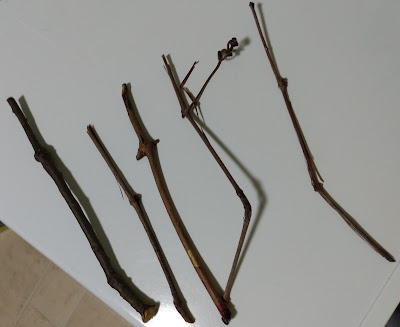
I used to cut these from the wild grapevines growing behind the building I lived in, diagonal cuts to make two ends, dry them, and use them for drawing with ink I made from black walnuts, also growing out back.
This is what van Gogh used in his early drawings. I used to give them to my drawing students, with samples of the ink. So they had an authentic experience.
These are what Blake called rural pens in his Songs of Innocence, except his was a hollow reed. Same idea, also making his own ink, in the narrative. This whole background was very interesting to adult students, seeing the connections across arts and cultures and history.
Anyway, enjoy your embossing/engraving adventures if you give it a try.
Simply beautiful! And I suppose you also make them staggeringly intricate, too. I will have to remember this technique.
ReplyDeleteI used to do chartpack lettering and transfers for graphs intended for scientific publication. Also did hand transfers with stencils and curlicue rulers. That was one of my first part-time jobs at university back in the 1970s. I liked the work, but my boss was a groper and a lecher. I had to keep running around to the other side of the drafting table! Luckily (for me, not him!) he had an artificial leg from injuries in WWII that squeaked, so I could hear him coming and get ready to dodge him. Ah - I miss the old days. Not.
I cannot help but comment that "ball burnishers" sound vaguely kinky.
ReplyDeleteLove the embossing! And those chocolates look amazing.
ReplyDeleteDebra, you can imagine the harty ha jokes in the graphics studio at the tv network where I worked. Also references to dry mounting.. moving right along here. I made a point of talking with the women artists when I needed graphics, for this and other reasons. One being they were the best.
ReplyDeleteSteve, now you see why she merits a handmade thank you card.
ReplyDeleteAmazing embossed cards, I like them.
ReplyDeleteYour talents, skills, and knowledge are endless! I never in my life would have even thought about doing embossing. I probably won't but if I ever chang my mind- I now know how! I doubt mine would look anything like yours though.
ReplyDeleteMary, I think the grandchildren would like to try this. Quite young kids can, if the stencil and paper are taped so they can just think about the drawing bit.
ReplyDeleteWell, I'm definitely going to have to give that a try.
ReplyDeleteThank you for the instructions, and the information. I will put them to good use.
ReplyDeleteVan Gogh's pen! How neat. Ay back in the olden days of blogging, I was going to name a blog after Blake's rural pen, but the name was in use already.
The embossed thank you card has now gone in the mail.
ReplyDeleteWhat beautiful work you did and so timely for the card. The chocolates look yummy!
ReplyDeleteBeautiful, and beautifully described.
ReplyDeleteA hand made card is a fitting thank you for those wonderful chocolates! You've reminded me that I had a couple small brass stencils meant for embossing - wonder where they might be, or did I winnow them??
ReplyDeleteWhat a fascinating way to teach using pens and ink you made. You must have been a wonderful teacher.
ReplyDeleteThank you, Liz. It was one of my themes -- make and respect your own art tools and materials.
ReplyDeleteReally lovely and what a wonderful surprise!
ReplyDeleteThe embossing makes lovely cards! My daughter-in-law made walnut ink as a homeschool art project. They discovered too late that they should have worn gloves when making the ink! They all had walnut-stained fingers!
ReplyDeleteThose pens look fascinating. I didn't know Van Gogh used similar ones. The embossing is also very cool. The only stencils I have, (designed and cut by me,) are by comparison with yours, rather simple and large, intended for furniture, clearly something finer is needed for paper.
ReplyDeleteYes, Bonnie, walnut ink is indelible. Somewhere I blogged instructions about making it, with warnings about that. It makes a wonderful dye for yarns and fabrics, doesn't even need a mordant.
ReplyDeleteOne of my friends let her little son run about barefoot while she collected black walnuts in the grass, and he had little stained feet for ages.
Jenny, I have some bigger, less detailed ones too, as you say, paper needs finer detail. If you have a set of French curves, you can use them, too, tracing around the outside edges rather than interior shapes.
This is as I imagined/remembered, but I don't think I've ever had at my disposal the burnishing tool. I must have used something like a bone folder as it has a rounded tip, but not nearly as precise as that ball burnisher. That is going on my gift wish list and I will gift it to myself at the first opportunity. I have blank cards (and I think I even know where they are) so I can easily set myself to doing this! Thank you for sharing this, Liz.
ReplyDeleteBe sure and blog about the cards. I'm very glad you're going to revisit embossing. My work here is done!!
ReplyDelete